
Getting started
Install and activate FreddyMail
On this page
Before FreddyMail can process emails, you need the plugin installed in WordPress and — if you bought a Pro license — your Freemius license key. This guide walks the full flow, from ZIP upload to the activated license modal.
1. Install the plugin in WordPress
- In the WordPress admin, open Plugins → Add New.
- Click Upload Plugin at the top, then select the FreddyMail ZIP.
- After upload, click Install Now and then Activate.
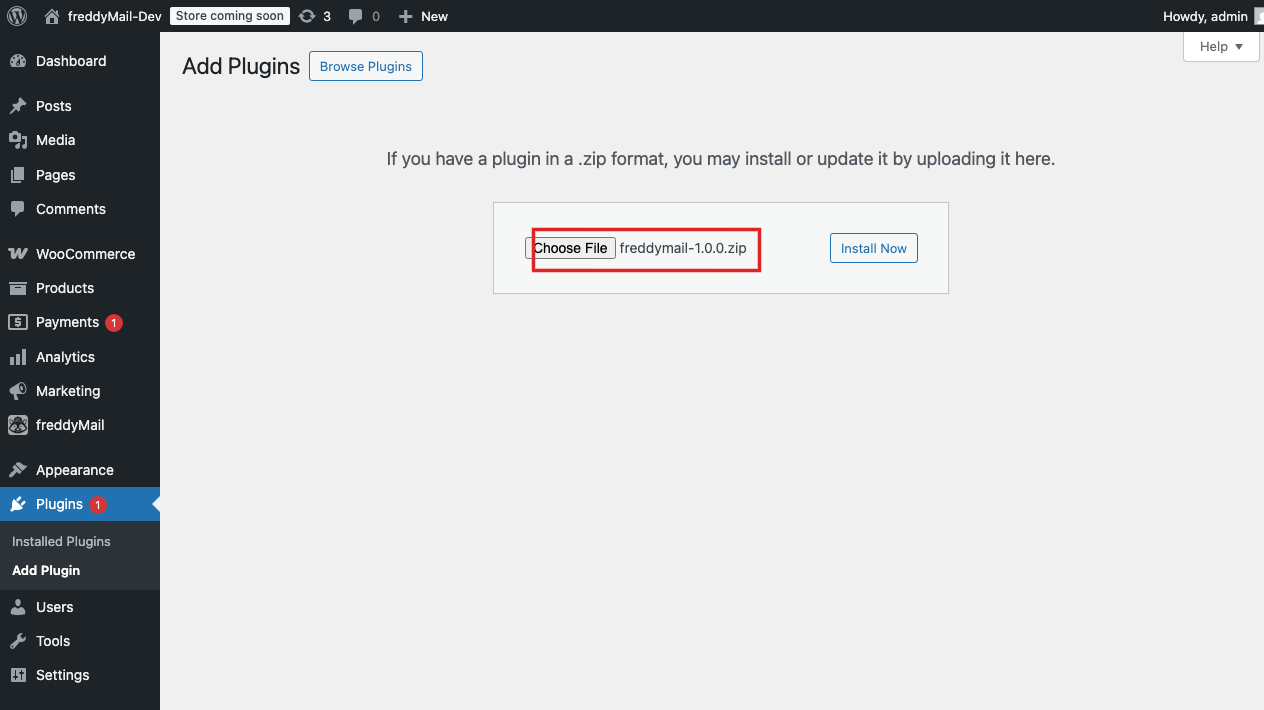 Annotated
 2. Check the activation notice
After a successful activation you see a green success message in the admin header. Any other yellow notices (e.g. Action Scheduler, WooCommerce HTTPS) come from other plugins and are non-critical — you wire up SMTP itself in the quickstart.
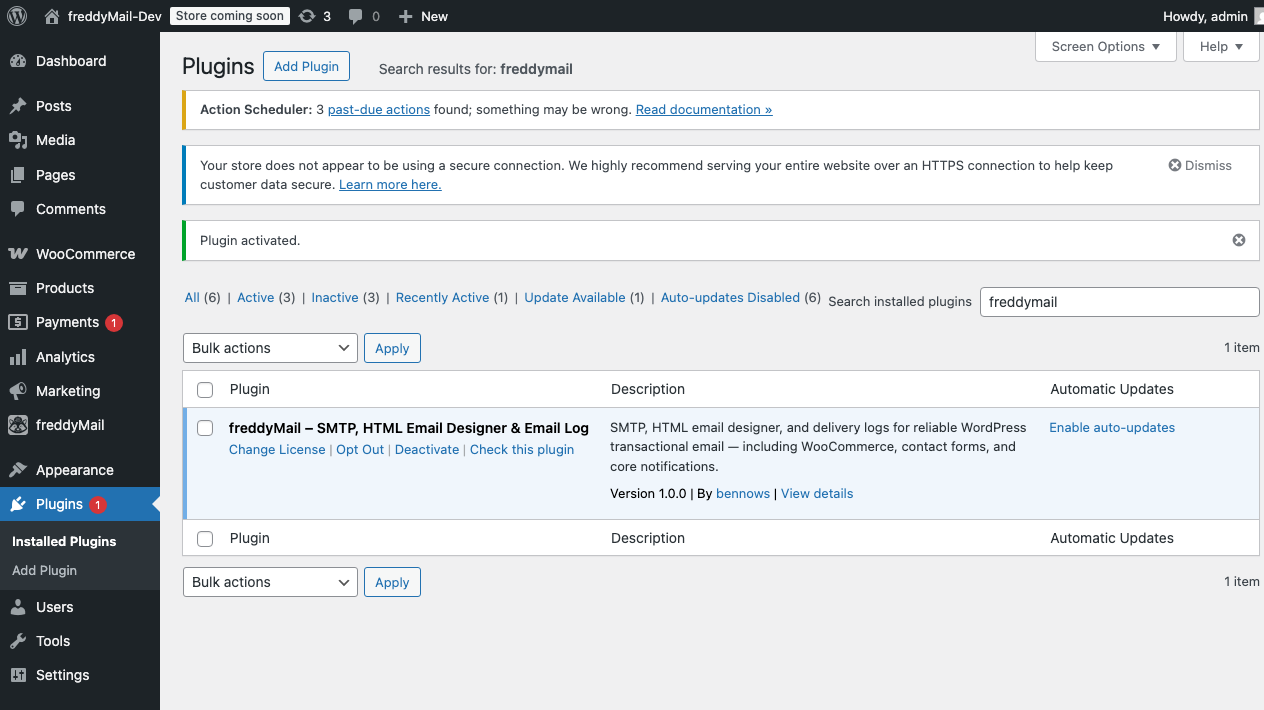
3. Activate the license
Activation runs through Freemius. The first time you open FreddyMail you see the upgrade overview with the available plans and a button if you already hold a key.
- Open FreddyMail from the left WordPress admin menu.
- Click I already have a license key (or pick a plan).
- Redeem the key on the Freemius page and return to the WordPress admin.
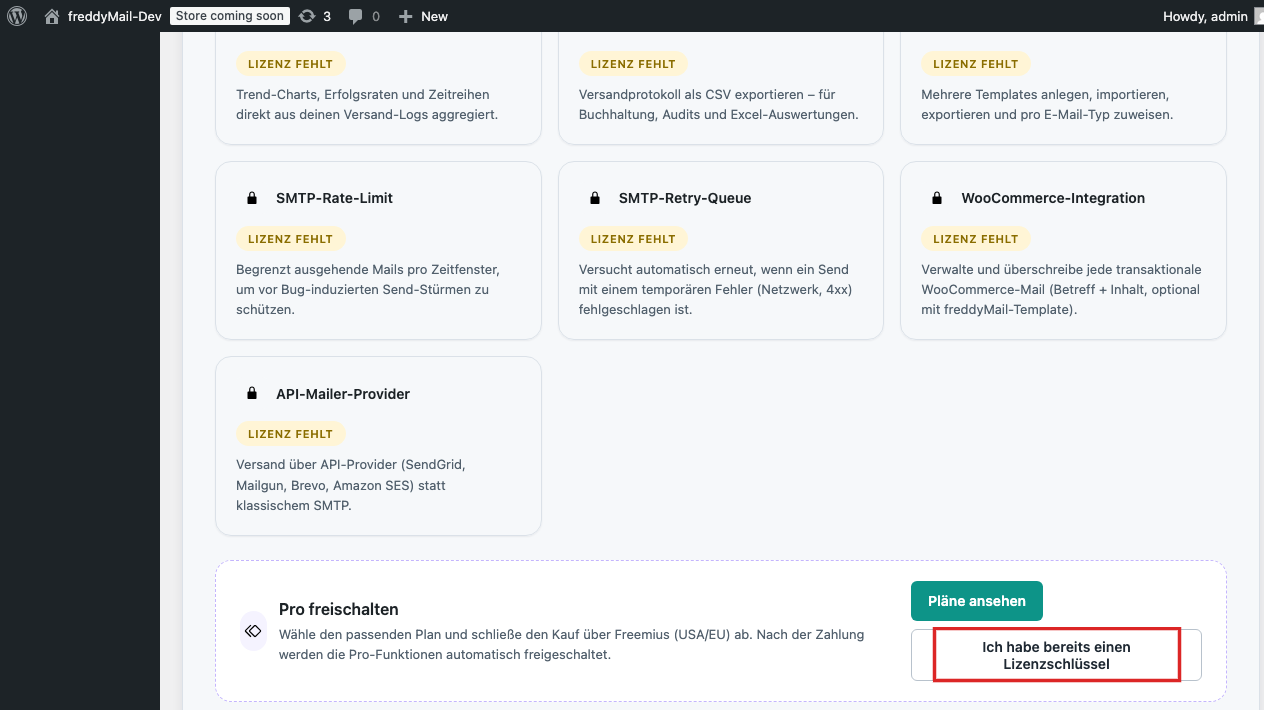 Annotated
 4. First look at the plugin
After activation you see six main areas in the left submenu:
- Dashboard — status, sent mail count, detected email types, log retention.
- SMTP Setup — delivery profile and provider configuration.
- Email types — map WordPress, WooCommerce and custom hooks to templates.
- Designer — build HTML templates and save them to the library.
- Logs — delivery history with status, recipient, type and provider response.
- Settings — global options like log retention and diagnostics.